How to Use a Compressor on Audio
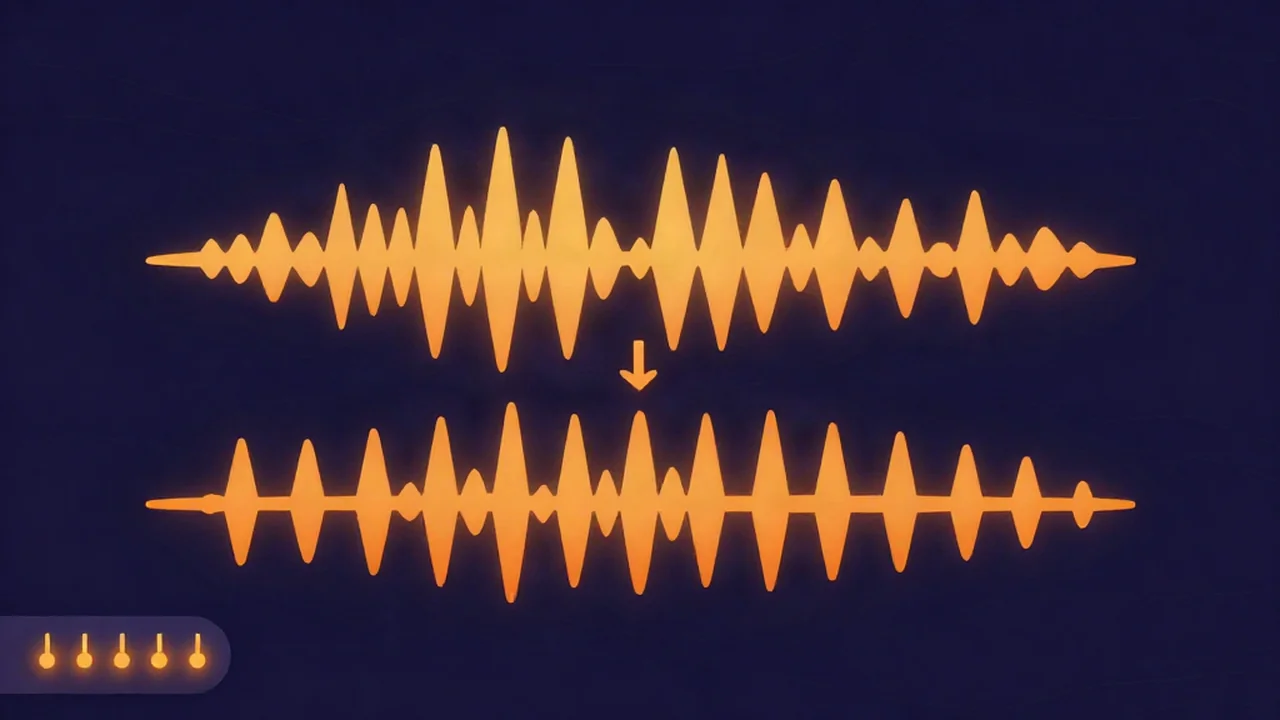
Here is how to use a compressor in one paragraph: open the free browser-based audio compressor, drop in your file, pick the preset closest to your material, then lower the Threshold slider until the loudest moments stop jumping out and raise Makeup gain to bring the level back up. The preview plays live while you drag, so you hear each change as you make it. On a typical vocal take, finding a setting you're happy with takes about five minutes, and the export takes a few seconds more.
What you'll need
- An audio file you already have. MP3, WAV, FLAC or M4A all load directly.
- Any modern browser. No account, no install, no plugin.
- Headphones or reasonable speakers. Compression is judged by ear, and laptop speakers hide most of what you're listening for.
Your audio never leaves your device. The compressor is a Web Audio node running inside your own browser tab, so your file is decoded, processed, previewed and exported locally.
What does an audio compressor do?
An audio compressor narrows the gap between the loudest and quietest parts of a signal, its dynamic range. You set a threshold level; anything that crosses it gets turned down by a ratio you choose. A vocal that swings between a whisper and a shout becomes a vocal that stays in one place in the mix.
Two things follow from that, and both catch people out:
- Compression only ever makes audio quieter. It is gain reduction. Nothing in the process adds level.
- Makeup gain is what makes it louder. Because the peaks are now lower, you can raise the whole signal before anything clips — so the average level ends up higher than it started. That is the entire reason compression gets described as making things louder.
For the conceptual background, including why "compression" here means dynamics and not file size, see what is audio compression.
The six controls, one at a time
Most audio compressor software gives you these same six controls, so what you learn here transfers to any plugin you meet later.
Threshold (−60 to 0 dB)
The level at which compression starts. Nothing below it is touched; everything above it is turned down. Lower the threshold and more of the performance gets compressed.
This tool has no gain-reduction meter, so you set the threshold by ear: pull it down slowly during a loud passage until the peaks settle without the quiet parts changing character. Start around −24 dB, then adjust: the right number depends entirely on how hot your file already is.
Ratio (1:1 to 20:1)
How hard the signal is turned down once it crosses the threshold. At 3:1, three decibels of input above the threshold become one decibel of output. At 1:1 nothing is reduced at all, which makes it a genuinely useful setting, as you'll see in step 7.
Start at 3:1 for vocals, 4:1 for rock or anything that needs a firmer grip, and 1.5:1 to 2:1 on a full mix.
Attack (0 to 300 ms)
Attack is where most tutorials go wrong. It is not a delay before the compressor kicks in: compression begins the instant the signal crosses the threshold. What attack sets is the rate at which the gain reduction ramps in.
With a slow attack, the reduction simply hasn't ramped up much by the time a short transient has passed, so the transient survives and the track keeps its punch. A fast attack (1–5 ms) clamps those transients and dulls the punch; 10–30 ms preserves them. On vocals a very fast attack can flatten consonants and hurt intelligibility, so treat that as genre-dependent rather than a universal rule.
Release (10 to 1000 ms)
How quickly the gain reduction lets go once the signal drops back below the threshold. Aim for it to recover just before the next hit lands.
Tempo is a useful reference: at 120 BPM a quarter note is 500 ms, an eighth note 250 ms, a sixteenth 125 ms. Too slow and the compressor never recovers, leaving the track permanently clamped. Too fast and you get audible pumping and breathing. A very fast release paired with a very fast attack can also produce real low-frequency distortion, because the compressor ends up changing gain within a single cycle of a bass note. Pumping is a deliberate effect in a lot of electronic music, though, not only a fault.
Knee (0 to 40 dB)
The knee value is the width of the transition zone the compression curve spans while bending from 1:1 up to your full ratio. A higher number means a wider, softer, more gradual transition; 0 dB means the ratio snaps on the moment the threshold is crossed.
One correction worth having, because generic tutorials get it wrong for this tool: in the Web Audio specification — which is what this compressor uses — the knee extends above the threshold. A soft knee here does not start compressing early, below the threshold, the way many hardware and DAW compressors do. Use a wide knee (20–30 dB) for transparent vocal and mix work, narrow (0–6 dB) when you want the compression to be obvious.
Makeup gain (0 to +12 dB)
A separate gain stage after the compressor that turns the whole signal back up. The Web Audio compressor node applies a small fixed makeup gain of its own that you cannot adjust, which is why the tool adds a separate stage you can actually move. Leave it at 0 while you're setting everything else, then raise it at the end.
| Control | Range | What it sets | Start at |
|---|---|---|---|
| Threshold | −60 to 0 dB | Where compression begins | −24 dB |
| Ratio | 1:1 to 20:1 | How hard it reduces | 3:1 |
| Attack | 0 to 300 ms | How fast reduction ramps in | 3–10 ms |
| Release | 10 to 1000 ms | How fast it lets go | 250 ms |
| Knee | 0 to 40 dB | Width of the soft transition | 30 dB |
| Makeup gain | 0 to +12 dB | Level back up afterwards | 0, then taste |
How to use a compressor, step by step
- Load your file. Drag it onto the dropzone or click to choose one. The filename appears with a Reset File button beside it if you need to swap tracks.
- Pick a preset. The Presets row gives you three starting points: Vocal (−24 dB, 3:1, 3 ms, 250 ms, 30 dB knee, +4 dB makeup), Master (−18 dB, 2:1, 10 ms, 250 ms, 20 dB knee, +2 dB makeup) and Aggressive (−30 dB, 12:1, 1 ms, 100 ms, 6 dB knee, +8 dB makeup).
- Set Makeup gain to 0. Do this before you judge anything. Otherwise you're comparing volume, not compression, and volume always wins that comparison.
- Press play. The round play button starts a live preview — the caption reads Previewing — tweak the controls to hear it live — and every slider you move takes effect straight away, without restarting playback.
- Set the threshold by ear. Lower it during the loudest section until the peaks stop pushing forward. Because there's no gain-reduction readout, use the audible drop in level as your meter: when the loud parts noticeably duck while the quiet parts stay put, you're in the working range. Roughly 3–6 dB of reduction sounds transparent, 5–10 dB sounds obviously controlled, and 10–20 dB is a crushed effect.
- Set ratio, then attack and release. Ratio decides how firm the grip is; attack decides whether the track keeps its punch; release decides whether it breathes or pumps.
- A/B against a true bypass. There is no bypass button, but there is a real workaround: set Ratio to 1:1 with makeup still at 0. At 1:1 the compressor applies no reduction at all, so you are hearing the source at matched loudness. Flip between 1:1 and your setting a few times. If the compressed version doesn't win at equal volume, it isn't better.
- Bring makeup gain up last. Raise it only until the compressed version sits at about the same perceived level as the original. Anything past that and you're back to fooling yourself with volume.
- Choose a format and export. Pick WAV for lossless, or MP3/Opus if you need a smaller file, then press the export button. The file downloads with a
compressed_prefix.
Starting settings by source
Threshold is the one value you should expect to move, because it depends on how loud your file already is. Everything else here holds up well as a starting point.
| Source | Ratio | Attack | Release | Knee | Target reduction |
|---|---|---|---|---|---|
| Lead vocal | 3:1 | 3–10 ms | 250 ms | 30 dB | 3–6 dB |
| Spoken word / podcast | 3:1 | 5–10 ms | 150–300 ms | 20–30 dB | 3–6 dB |
| Full mix / master bus | 1.5:1–2:1 | 10–30 ms | 250 ms | 20 dB | 1–3 dB |
| Drums / aggressive effect | 8:1–12:1 | 1–3 ms | 100 ms | 0–6 dB | 10 dB+ |
On a full mix the useful range is far narrower than people expect. One to two decibels of reduction gives subtle cohesion; around three decibels is audible glue. Past that you are usually removing the life from a mix rather than tightening it.
Common problems and how to fix them
It pumps or breathes. Release is too fast, or the threshold is too low so the compressor is working on everything. Lengthen release toward 250–400 ms and raise the threshold. If a very fast attack and release together are adding a low-frequency growl, that is real distortion from the gain envelope moving inside a bass waveform.
It sounds dull and lifeless. Attack is too fast, so the transients at the front of each word or hit are being clamped. Move attack from 1–3 ms up to 10–30 ms and listen for the punch coming back. A wider knee helps here too.
It sounds distorted. Either the compression itself is too aggressive, or makeup gain has pushed the output past full scale into clipping. Drop makeup gain first, then raise the threshold.
It sounds worse than the original. Do the 1:1 comparison from step 7. Plenty of tracks genuinely don't need compression, a well-performed acoustic take or an already-mastered file among them, and finding that out is a valid result.
It sounds better, but only because it's louder. Turn anything up and it tends to win the comparison. Part of that is measurable: as playback level rises the ear's frequency response flattens, so a louder version really does reveal relatively more low end and more top end. That much is what the equal-loudness contours in ISO 226:2023 describe. The preference that follows is just bias, and it is the whole reason steps 3 and 7 exist.
Where compression fits in the rest of the chain
Compression is one stage. If the tonal balance is wrong, reach for the 6-band graphic equalizer instead — compression can't fix a muddy low end. If you want the full finishing chain rather than one control, the online audio mastering tool handles compression, EQ and limiting together and reports LUFS. And if all you actually need is consistent level between tracks, the volume normalizer does that without touching dynamics at all.
One last thing worth knowing before you crush anything: over-compressing does not make you louder on streaming. Spotify, YouTube and Apple Music all normalize playback loudness, so a squashed master just arrives turned down. You gave away the dynamics and got nothing for them. More tutorials like this one live in the how-to guides section.
Frequently asked questions
What does an audio compressor do?
It reduces the difference between the loudest and quietest parts of a signal. Anything crossing a level you set — the threshold — is turned down by a ratio you choose. The result is a more consistent, controlled sound. On its own it only makes audio quieter; a makeup gain stage afterwards raises the whole signal back up, which is why compression is associated with loudness.
What is the difference between an audio compressor and a limiter?
A limiter is a compressor with a very high ratio and a very fast attack, used to stop a signal exceeding a ceiling rather than to shape how it feels. A compressor sculpts dynamics throughout a performance; a limiter catches the few peaks that would otherwise clip, usually as the last stage in a chain. See compressor vs limiter for the full breakdown.
What compressor settings should I use for vocals?
Start with a 3:1 ratio, an attack of 3–10 ms, a release around 250 ms and a wide knee of about 30 dB, then set the threshold so the loudest phrases audibly duck by roughly 3–6 dB. That range sounds transparent. Use 4:1 for rock or anything that needs a firmer hold, and avoid very fast attacks, which can blunt consonants and hurt intelligibility.
How much compression is too much?
For transparent control, 3–6 dB of gain reduction on a vocal and only 1–3 dB on a full mix. Around 5–10 dB sounds obviously controlled, and 10–20 dB is a deliberate crushed effect rather than a mistake — as long as you chose it. The reliable test is comparing against the uncompressed signal at matched loudness; if the compressed version doesn't win, back off.
Should I compress before or after EQ?
Both orders are common and both are defensible. EQ before compression means the compressor reacts to the balance you have already corrected, which is usually the safer default — cut a boomy low end first and the compressor stops ducking the whole track every time the bass hits. EQ after compression lets you shape the tone of the finished, controlled sound. Try both and trust your ears.