How to Cut Audio Without Losing Quality
Before software, editing sound meant physically cutting tape. An engineer ran a reel across the playback head, marked the exact spot with a grease pencil, sliced it with a razor blade, and spliced the two ends back together. Precise, permanent, unforgiving — a cut a fraction of an inch off announced itself as an audible click or a chopped-off word. That old constraint is exactly why cutting audio well is still more delicate than most people expect, even though the razor is now a mouse click.
Digital gave you sample-level precision
Digital editing removed the physical risk of a botched splice, but not the underlying challenge: a cut still has to land at the right point or it sounds wrong. What changed is the precision. A tape splice was limited by how finely a human hand could cut a moving strip. Digital audio is addressable sample by sample — the individual data points that make up a waveform, tens of thousands of them per second. That's precision no razor could touch, and it's what lets you trim a word, a breath, or a single drum hit accurately instead of approximately.
"Frame-perfect" is the wrong benchmark
If you edit video, you think in frames — discrete steps, usually 24 to 60 per second. It's tempting to assume audio works the same way. It doesn't, and the gap matters. One video frame lasts roughly 16–40 milliseconds, far too coarse for audio: the ear perceives timing differences much smaller than that, and a cut landing even a few milliseconds off can produce a click, a pop, or a clipped consonant. Good audio editing isn't about the nearest frame — it's about the nearest zero-crossing, the moment the waveform passes through silence, ideally during a natural pause. Cut there and the edit is genuinely inaudible rather than merely close.
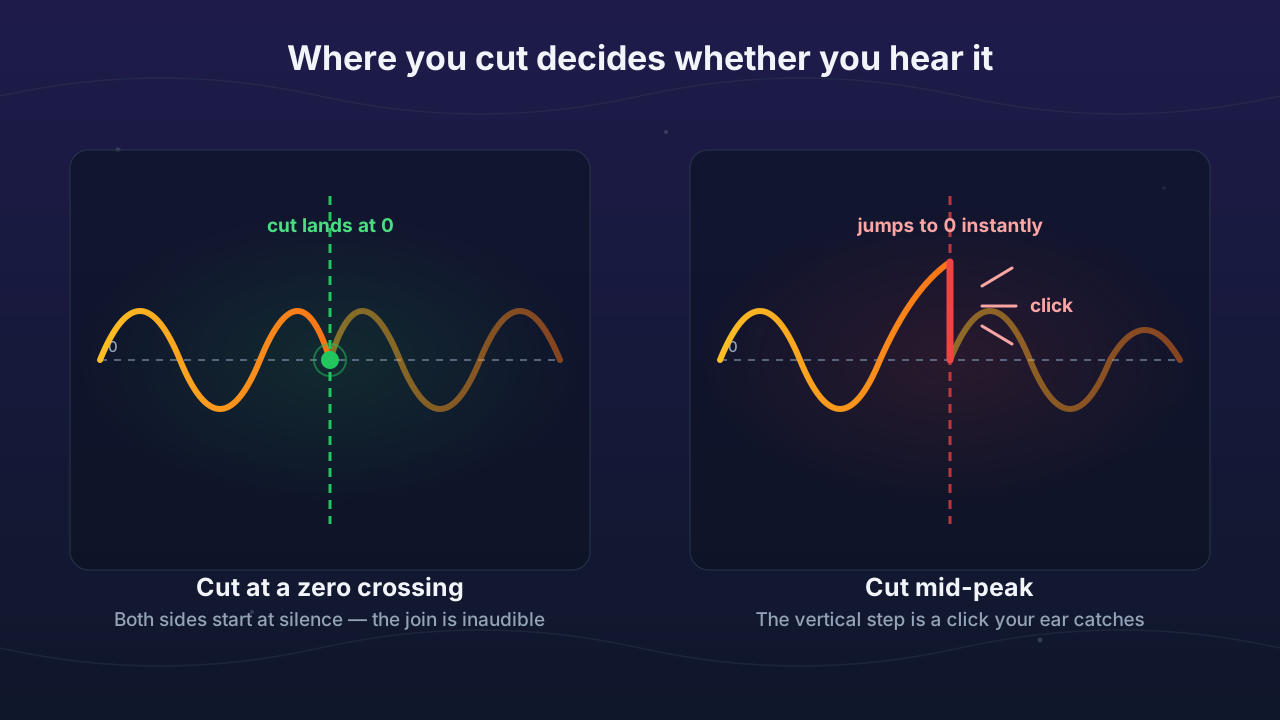
The difference is easier to see than to describe. On the left, the waveform is already at zero when the cut happens, so the next segment starts from silence and the join passes unnoticed. On the right, the signal is caught mid-peak and forced instantly to zero — that vertical step is a discontinuity, and a discontinuity is exactly what your ear reports as a click.
Trust your ears, not the waveform picture
Modern tools let you zoom in and select a point far more precisely than tape ever allowed — but precision alone doesn't guarantee a clean cut, it just gives you the means to find one. A waveform can look like a fine place to cut and still sound wrong: a visual gap doesn't always line up with silence to your ears, and a cut placed mid-syllable can look tidy while sounding jarring. That's why previewing a trim beats eyeballing it. A quick listen catches the difference between a cut that looks right and one that actually sounds right — often not the same place.
Habits for common cutting jobs
- Trimming dead air? Leave a sliver of natural room tone rather than cutting to absolute silence — an instant total cutoff can sound more abrupt than a fraction of a second of ambience fading out. For long gaps throughout a recording, a silence remover automates this — see how to remove silence from audio.
- Extracting a clip (a quote, a ringtone)? Start and end on a natural pause or musical rest, not mid-word — that's where a listener expects a cut anyway.
- Not sure a point is clean? Nudge it a tenth of a second earlier or later and compare. That tiny move is often the whole difference between a click and a seamless edit.
- Work from the best source you have. The cut itself adds no quality loss, but a heavily compressed source keeps its baked-in artifacts in the trimmed result. (Which formats preserve detail?)
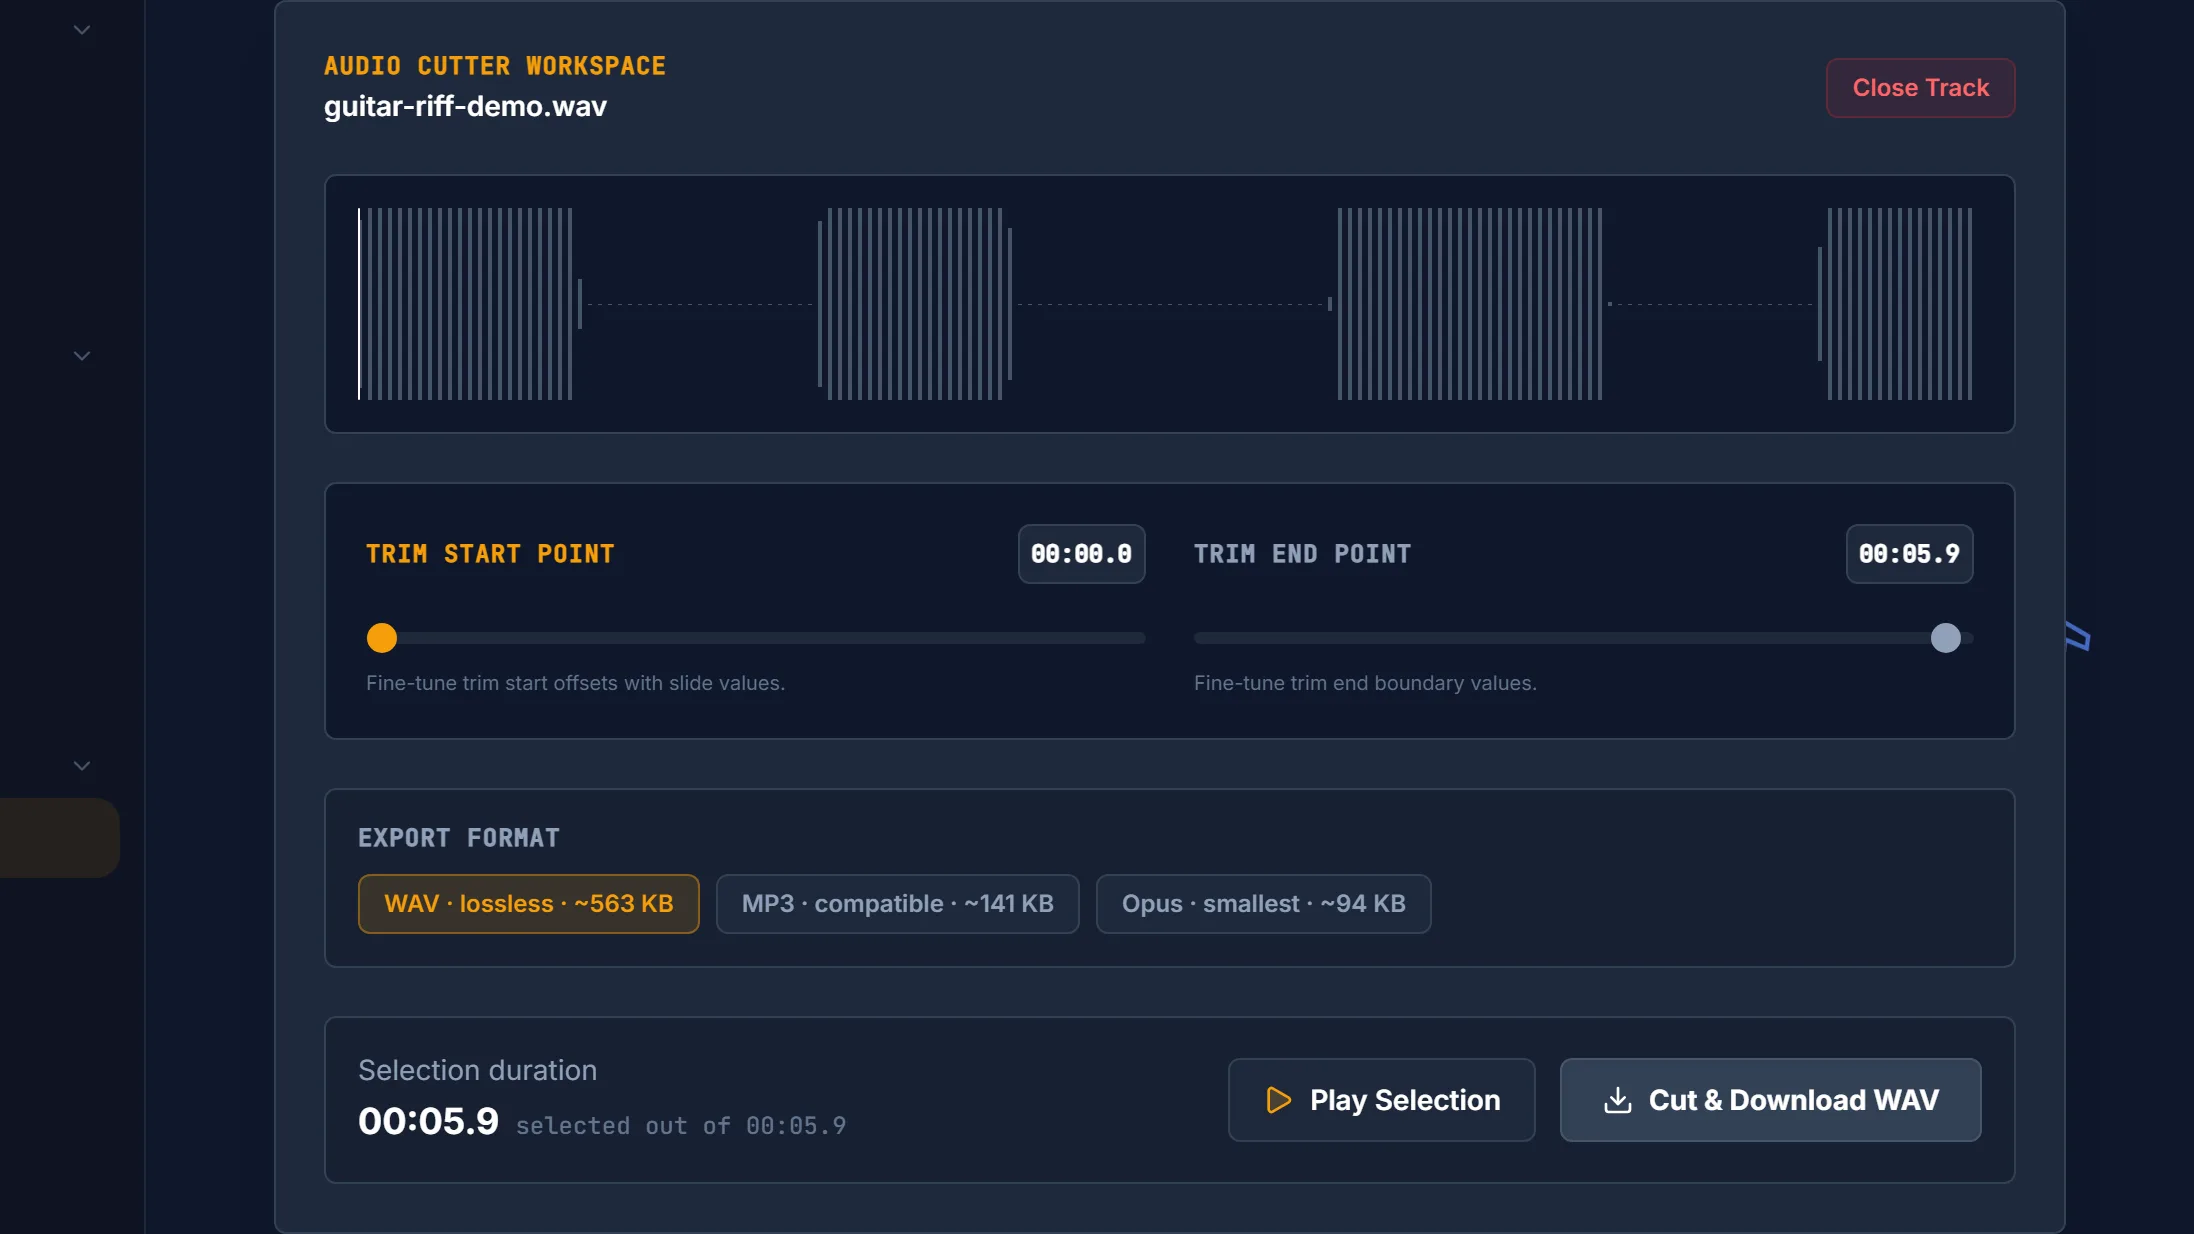
In practice that's what the audio cutter puts in front of you: the waveform to find the moment, a trim point at each end you can nudge to the sample, and a preview so you can hear the join before committing to it. None of that needs a full production environment either — if you're weighing an install for jobs like this one, we sort out whether you need a DAW or an online audio editor task by task.
Frequently asked questions
Does cutting audio reduce its quality? No — trimming removes a section without re-encoding the rest, so the audio you keep is bit-for-bit identical. Quality only suffers if you started from an already-compressed file or re-export to a lossy format.
What causes a click at my cut point? Cutting in the middle of a waveform rather than at a zero-crossing. Move the point to a natural pause or a moment the signal is already quiet, and the click disappears.
What's the easiest way to trim a clip precisely? Use a tool built for it. The audio cutter gives you sample-level sliders and an instant preview so you can hear the trim before you commit.